Showing posts with label altered art. Show all posts

Tuesday, 18 September 2012

ART OR DESTRUCTION?


 I RECENTLY read an article in a craft magazine that gave instructions on how to make a cushion from old embroidered tray cloths, chair covers, doilies and table cloths. The way to do this was to collect these, cut them up and arrange the pieces prior to sewing them together.  

SO MY question as I begin a new project is when does 'upcycling, re-purposing and altering' items stop being art and become wanton destruction.  
I have just purchased this
little wooden pot froma junk shop for £1.00,  as you can see the original design on the lid has been quite badly damaged.  After conversation with my mother we decided it probably dates from the 1930's.  We also decided that the amount of damage that has happened to it means that it will be acceptable to do pretty much what I like to it.  So is this just me being precious
or do others feel the same at the start of a new project?  Is it right that we believe we can improve on the crafts and skills of our ancestors or are we really paying a form of homage to them.


I started to sand this pot and found when I (quite easily) removed the varnish that although the original design would take a lot more effort to banish on the bottom part of the pot the lid has only remnants left.  Not quite sure how to incorporate it and I do not want to paint over.  Some thought is needed.


Friday, 2 March 2012

Altered books - part two.


 IT HAS BEEN EASIER TO 
continue with altering this book because all the cutting has been completed.
NOW MY BOOK IS READY TO DECORATE.  The papers I chose for the front and back covers have been glued on, with a hole cut in the front cover.  All the pages that needed to be glued together have been.  I decided to print some custom cotton tape for the edges of the covers because I thought that would be harder wearing.  

(PRINTING COTTON TAPE :- USE DOUBLE SIDED TAPE TO ATTACH INCH WIDE COTTON TAPE ONTO A SHEET OF A4 PAPER.  I CHOSE SOME FERN LEAF CLEAR STAMPS, WHICH I STUCK UNTO A STAMPING BLOCK.  STAMP RANDOMLY OVER THE PAGE - I USED TWO COLOURS  WAIT TILL INK IS COMPLETELY DRY BEFORE PEELING OFF THE BACKING SHEET AND USING ON THE PROJECT).


 I wanted to use the printer to do the cotton tape but the printer that I have just would not do it today, it is quite often fussy about what it will print.  So I had to go with PLAN B.  I am pleased with the result.  


I dry brushed the pages with white GESSO making sure that some of the print could be seen through the paint and left to dry completely. 

Saturday, 18 February 2012

ALTERED BOOKS - how hard can it be?

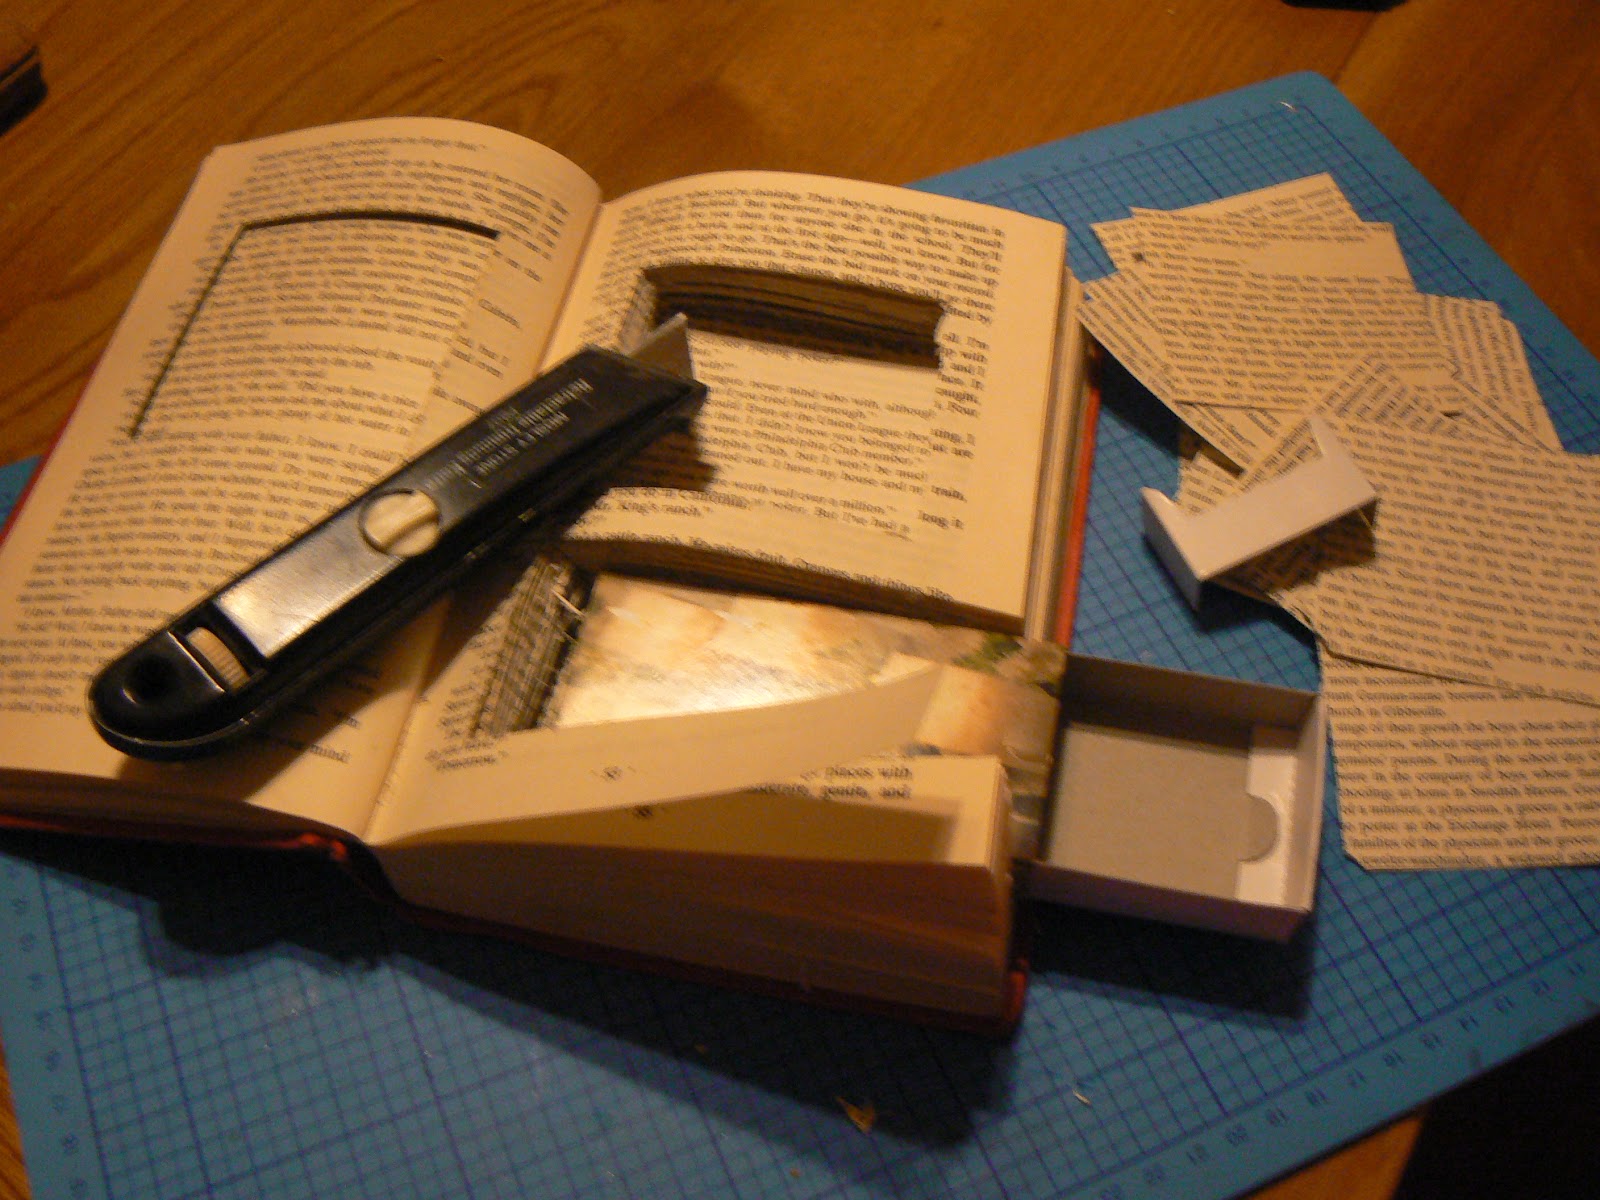
Last autumn inspired by a magazine article I purchased a couple of old, very boring looking hardback books with the intention of altering them.  They didn't cost very much and meant nothing to me.  I liked the idea of secret drawers and little compartments hidden within the pages of a book.  I read and re-read the article several times, found some matchboxes of the right size and shape for the drawers and time past by.


Last weekend I decided to make a start altering the first book.  I drew in the two areas that I needed for the drawer and the compartment.  Then it was time to pick up the knife and start cutting.  I cannot describe how painful it was to deliberately damage a book - it really felt wrong.  I don't know if this is just me, did the designers in writing books about ALTERED ART or for magazines feel the same way the first time and if I decide to make another one will it be easier making the first cut.


It would have been easier if I had remembered to cover the book before starting to glue the pages together and I think I made my home made MODGE PODGE a little to runny but on the whole it is going to plan. Starting from the back - I have stuck one group of pages together at the back of the book for some journaling, then carried on glueing pages togther around the matchbox and onto the compartment. I am going to have another page further foreward to decorate. The outside of the backcover has been covered, I just need to edge the cover before glueing down the back pages of the book and I think that I will cut a hole in the front cover before covering it. 

Monday, 9 January 2012

Trying to master Serif craft artist

As it was so mild today I decided to tackle the mass of ivy that is overhanging our drive.  None of the ivy has come from our side of the wall. I have been meaning to do this for some months now but haven't done it because I knew what a mamoth task it was going to be.  The wall is only just longer than our car so not a very long wall. So far fifteen bags have been taken to the tip and I wouldn't be too suprised if we don't get as much again before we are done.  That is how much of the day was spent.

I did find time to practice editing photos with my Christmas present SERIF CRAFT ARTIST.  While I was reading the manual I saw there were ways to mask part of your photo and change the rest of it with various filters.  It took me several attempts but I have finally got the hang of it. 
I used a picture of a orange hot rod taken a couple of years ago at a car show.  I masked the car and used one of the lighting filters to give the background an old feel and make the orange stand out.

http://www.daisytrail.com/scrapbook.html?uid=90900&g=42ee9382-2601-11e0-8811-90fba6bf896f&m=FP01U/RUK01&from_app=true   

This link will take you to DAISY TRAIL home of craft artist.

Sunday, 13 November 2011

PRINTING ON COTTON TAPE

Today I started to make the bag my niece said she would like for Christmas.  Her requests are:- a different colour to white because it would dirty ( she is right I have been using mine since the begining of August and even if you discount the teastains it is looking a bit grubby), A4 portrait not the landscape format that I have been using, and a picture of Bruce (my cat) - to start with she wanted him awake then changed her mind to asleep.

I am not convinced that she will find the portrait format as roomy as she thinks as a bag so I decided to make panels on the sides of the bag before putting the gusset in.  For the design both choices were possible - a sleeping cat dreaming of his waking moments.  Over the weekend I caught a snippet of the craft channel where they werer talking about inkjet tape.  A special cotton tape that you could put through an injet printer.  I tried doing this with the cotton tape that I had and even with my rather sulky printer it worked.  Now having used my JAYNE NETLEY MAYHEW COLLECTION CD-ROM I have several pieces of leopard print tape to edge the panels with. This opens up a whole world of possibilities to explore see link for Joanna Sheen stockist of the cd-rom. 


http://www.joannasheen.com/craft-supplies/joanna-sheen-cdrom-dvds/cdrom-jayne-netley-mayhew-collection-2-disk-set/
The bag design again I worked out using SERIF DIGITAL SCRAPBOOK.
http://www.daisytrail.com/scrapbook.html?uid=21043  one of my pages.

The other tip (from PINTREST) that I want to follow up is tranfering a photo or picture to wood or canvas or plastic.  I just need to get some acrilic gel medium.  Hopefully I can get this in hobbycraft tomorrow evening.  http://www.youtube.com/watch?v=_NjYbAAQ4vw  It looks easy and effective.  Watch this space for the results.  I got some of those 8x8 wooden mirrors from Ikea while we were there which would be perfect for this technique.

My sister showed me some the things she has been working on to add to my Etsy shop - really different to things I have been doing.http://www.etsy.com/people/dreamtimemakes

Friday, 28 October 2011

Bags and Blueberry snickerdoodles


Finished the bag I was making - this time I used some stickers instead of stamping images on them. This has given a interesting 3D effect. I will use stickers again as I really liked the result.  My friend loved her bag and is talking about getting me to make some for her grand- daughters.


http://buddingbaketress.blogspot.com/2011/06/blueberry-snickerdoodles.html
Yesterday I made one of the recipes I discovered on Pinterest. It was so yummy. I can recmend them.  I am thinking of doing an apple version over the weekend.        I have put a link to Bakergirls blog in case anyone wants to try making them.  Because it is an American recipe you need to know that ALL PURPOSE FLOUR IS plain flour and a STICK OF BUTTER is 4ounces or 113grams.

Saturday, 15 October 2011

Some of the bags I have made

have tree will climb
umbrella put outside to dry - I thought it was for me.
Bruce under an umbrella